Every week we get a version of the same question from clients and architects: “Do you TIG weld or MIG weld?” The expected answer seems to be one or the other, as if one is professional and one isn’t. The honest answer is that we run both, often on the same project, and the process gets matched to the joint, not the other way around.
So here’s how the choice actually gets made on a real custom Vancouver home or commercial project, and why the distinction matters when you’re evaluating a fabricator.
What the processes actually do
MIG, formally Gas Metal Arc Welding (GMAW), feeds a continuous wire through a torch. The wire is the electrode and the filler metal at the same time. Shielding gas flows around the arc to protect the weld pool from atmospheric contamination. You point the torch and pull the trigger; metal deposits at a controlled rate.
TIG, formally Gas Tungsten Arc Welding (GTAW), uses a non-consumable tungsten electrode to strike the arc. The welder feeds a separate filler rod into the puddle by hand, often modulating the current with a foot pedal. Shielding gas, typically argon, flows around the tungsten.
The mechanical difference is the source of every other difference. MIG’s continuous feed makes it fast and easy to lay long beads. TIG’s manual control makes it slow but precise.
Speed: MIG, by a lot
On a long structural weld, say, joining a steel stringer to a baseplate or filling a fillet between two beam flanges, MIG can deposit metal three or four times faster than TIG. For shop production on structural assemblies, that speed isn’t a luxury, it’s the economics of how the work gets priced.
This is why most residential structural steel on a Vancouver home is MIG welded. The joints are sized for code-compliant structural performance, the welds get inspected (and on critical welds, NDT-tested), and the deposited metal volume is high enough that running TIG would push the cost up without adding any structural benefit.
A MIG weld can be ground smooth, painted, or galvanized, and the resulting structural assembly is fully code-compliant. There’s nothing second-class about it.
Cleanliness and control: TIG
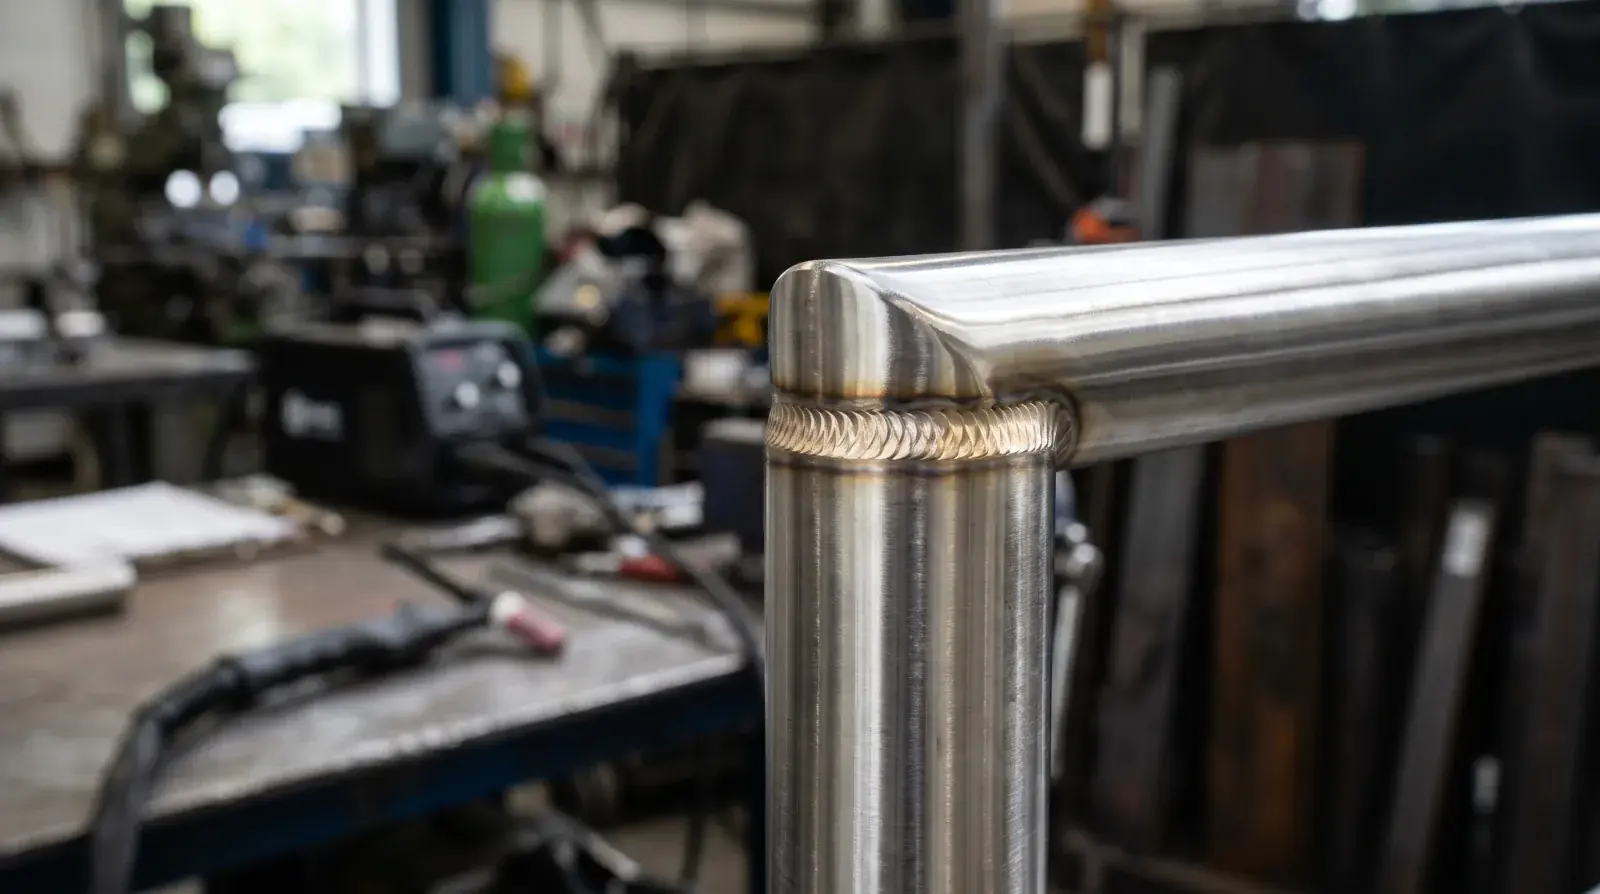
The trade-off is bead appearance and heat control. A TIG weld in skilled hands is a clean, low-spatter line with consistent profile and minimal heat-affected zone discolouration. You can run a TIG bead along a stainless handrail and leave it as the finish, no grinding, no cleanup, and it looks like the joint was meant to be there.
That’s almost impossible with MIG. MIG bead has more texture, more spatter, and more discolouration along the joint, especially on stainless. You can grind and polish it, but on stainless steel where the grain pattern of the brushed finish needs to carry through the weld, TIG is the only process that produces a starting bead clean enough to make that work.
So for any visible architectural joint on a Vancouver custom stair or rail, anywhere the client is going to look directly at the weld, we TIG. The slower process is what produces the appearance the client paid for.
Heat input and material thickness
TIG runs cooler than MIG for a given weld size, which matters on thin material. A 1.5 mm stainless tube TIG welds cleanly; the same joint in MIG risks burn-through and warping. Thin material wants TIG.
Thick material, heavy structural plate, beam flanges, baseplates, wants MIG. The higher heat input drives penetration, and the speed makes the long welds practical. Trying to TIG-weld a 12 mm structural connection is technically possible but commercially absurd.
The rule of thumb: TIG for under about 6 mm where finish matters; MIG for structural thicknesses and any joint that’s going to be hidden or finished. Most projects use both, and the welder picks the process based on the joint in front of them.
Stainless steel: TIG, almost always
Stainless steel shows weld contamination clearly. Argon shielding and clean filler are what keep a stainless weld silver, and TIG’s low-spatter, controllable process is what keeps the heat-affected zone narrow enough that the discolouration doesn’t extend far beyond the bead. Pickling and passivation clean up what’s left.
For a 304 stainless interior rail or a 316 coastal exterior rail, TIG is the default. We’ll use MIG on hidden stainless joints, a structural attachment inside a post that’s going to be capped, but anything visible is TIG.
Aluminum: a different conversation
Aluminum conducts heat fast and oxidizes instantly. It needs AC TIG (alternating current) to break the oxide layer during welding, and the technique is meaningfully different from steel. We TIG-weld aluminum railings and architectural elements with the right setup, but it’s not a casual switch from a steel shop. A shop that doesn’t do aluminum regularly should refer the work or send it out, the welds will tell you if they didn’t.
Stick welding (SMAW)
We rarely use stick welding on architectural or residential work. It’s still common for heavy structural field welds and certain repair scenarios, but the bead is coarser, requires more cleanup, and isn’t suited to the finish levels modern Vancouver homes expect. MIG and TIG cover essentially everything we fabricate.
What this means for evaluating a shop
When you’re picking a fabricator for a custom Vancouver project, asking which welding process they use is the wrong question. The right questions are:
- Are they C.W.B. certified for the processes the project needs?
- Do they show you both MIG and TIG work on past projects?
- Do their welders pass procedure qualification tests for the materials and joint types on your job?
- Do they coordinate weld inspection on critical welds, where required?
A shop with only MIG capability will tell you MIG is all you need. A shop with only TIG capability will tell you TIG is better. A shop that does both will tell you it depends on the joint, and that’s the answer that holds up on a complicated custom project.
On your specific project
For a Burnaby or Vancouver custom home with a steel stair, a stainless rail, and structural connections to existing framing, the answer is usually: MIG the structural attachments, TIG the visible architectural joints. Maybe AC TIG on aluminum elements if any are involved. One shop, one drawing set, multiple processes, coordinated so the project doesn’t get split across vendors.
If you’re scoping a project and want to understand what welds will be where on the finished work, bring the drawings to us and we’ll walk through the process choices joint by joint. The welds are part of what you’re paying for, and you should know exactly what you’re getting.