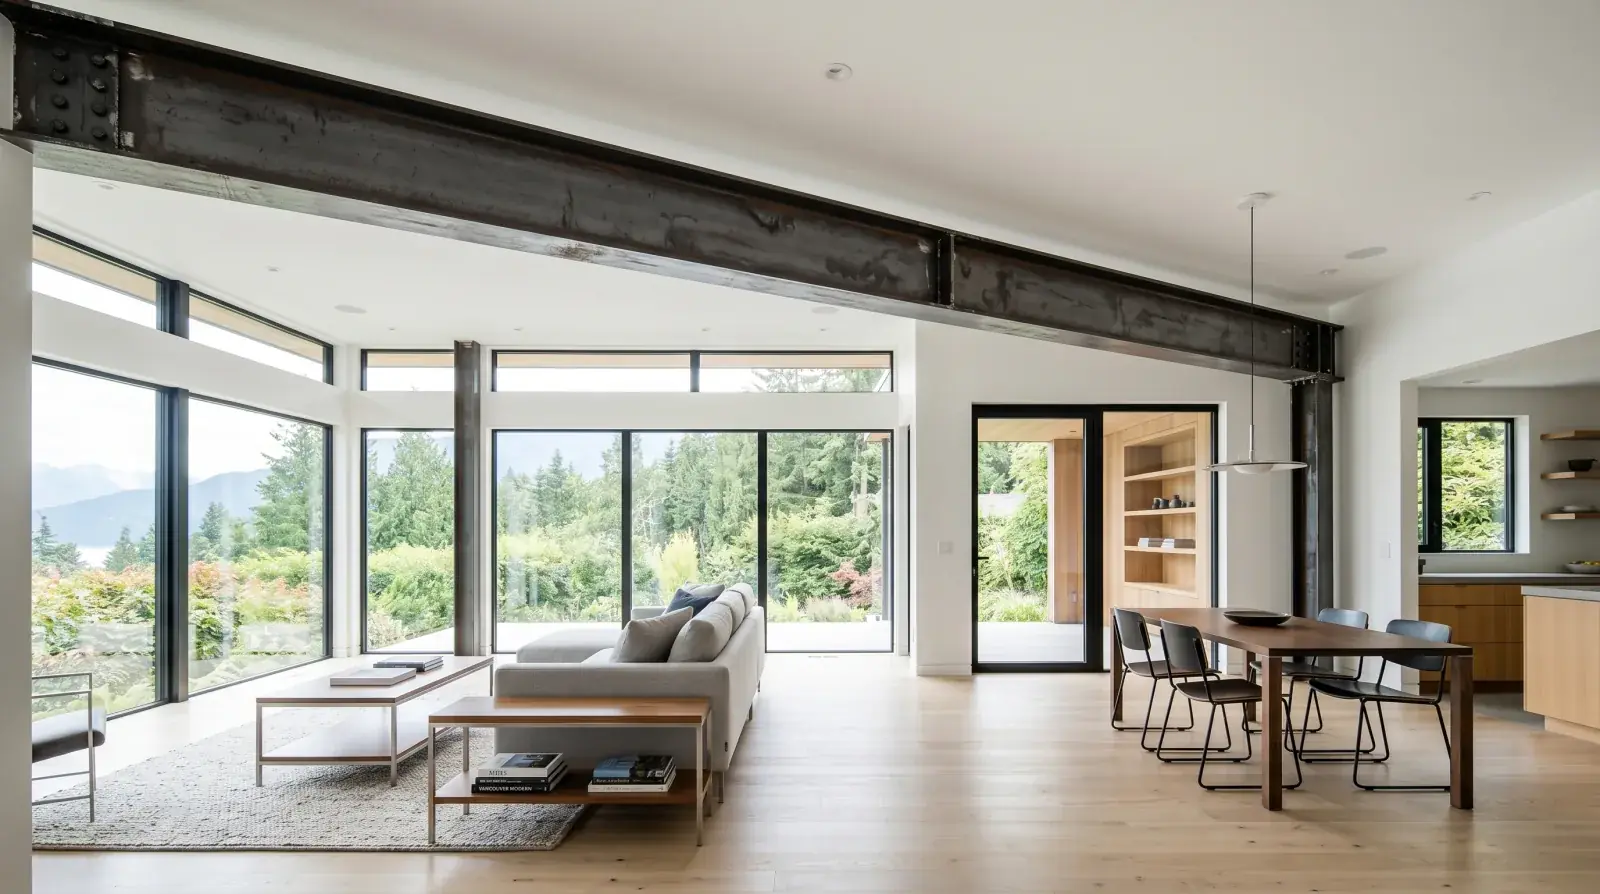
A common Vancouver renovation scope: the family wants the wall between the kitchen and the living room gone, the structural engineer specifies a steel beam to carry the load, and at some point the question comes up, should we hide the beam or leave it exposed?
Leaving it exposed often produces a better result. It saves the labour and material of building a bulkhead. It reads as a deliberate architectural element rather than infrastructure being apologized for. And on a modern interior, a clean steel line across the ceiling can be the single best detail in the room.
But “exposed” isn’t a finish. It’s a decision to commit to a finish, and the finish call is what determines whether the beam reads architectural or like a cheap retrofit that someone gave up on bulkheading.
The four options
There are realistically four finish paths for a residential exposed beam: sealed mill scale, blackened steel, painted, and clear-coated raw. Each has a look, a cost, and an install sequence.
Sealed mill scale
Mill scale is the dark blue-grey oxide layer that forms on hot-rolled structural steel during manufacturing. It’s the surface the steel arrives with from the mill. Left alone, it’s somewhat protective in interior conditions but will eventually flake or stain. Sealed with a clear matte coating, the mill scale becomes the finish, a deep, slightly variegated dark surface with subtle tonal variation.
This is the most economical of the four finishes because the surface prep is minimal, clean the steel, fix any handling marks, clear-coat. The look is honest and industrial-modern. It works beautifully in a loft, a converted commercial space, or a modern East Vancouver renovation that’s already leaning into raw materials. It can feel out of place in a traditional or transitional interior.
Blackened steel
Blackened steel is a chemical patina applied to clean steel after surface prep. The result is a deeper, more uniform black-brown finish with hand-applied variation. It reads as a deliberately architectural surface, closer to a designed material than a structural element being shown.
Blackened finishes pair particularly well with white oak, with light walls, and with concrete, the combination shows up constantly in West Coast modern interiors right now. It’s more expensive than sealed mill scale because the prep is more demanding and the patina is hand-applied. It’s also less forgiving, any imperfection in the steel surface shows under the patina, so the beam has to be clean and the welds have to be ground flush.
Painted
Painted steel, any colour, any sheen, is the most flexible option. A matte black painted beam reads industrial and crisp. A custom colour reads as a designed accent. A bronze metallic paint can pick up other metal finishes in the room.
The surface prep determines the result. A beam painted directly over rough mill scale will look like a painted utility beam. A beam with the mill scale removed, the surface ground smooth, and a high-quality coating system applied will look like a designed architectural element. The paint isn’t the cost, the prep is.
For exterior exposed beams, painted finishes need a coastal-rated coating system. This is the same conversation as exterior mono stringer galvanizing, the climate demands a real coating, not a hardware-store rattle can.
Clear-coated raw
The cleanest, most demanding finish: surface-prepped steel, sandblasted or wire-brushed to a uniform metallic look, sealed with a clear matte coating. The result is honest steel, silvery and slightly textured, without oxidation. It’s beautiful in the right space and very specific in mood.
The catch is the prep. To look right, the surface has to be uniformly prepared across the entire beam, including all weld joints, and the clear coat has to be applied evenly. Any inconsistency in the prep shows through the clear coat as a visible blotch. This is shop work, and it’s labour-intensive. It also requires the steel to be installed clean, handling marks and forklift scrapes during install will show up under the clear coat.
What the finish decision actually depends on
Three things drive the finish call on a real project:
The room’s overall design language. Mill scale fits an industrial-modern space. Blackened steel fits a high-end architectural interior. Painted fits everything but at varying cost depending on the prep. Clear-coated raw fits a specific aesthetic that prioritizes honesty of material over warmth.
The condition of the steel. A clean, well-fabricated beam can carry any finish. A beam with rough welds, handling damage, or surface imperfections shows the imperfections worse under some finishes than others. Painted with proper prep hides imperfections best; clear-coated raw shows them most.
The install sequence. If the beam requires field welding, a connection welded on site rather than bolted, the finish has to be applied after the field welds. That means the finish either happens on site (compromised conditions, higher risk of imperfections) or the beam comes in shop-finished except at the weld locations, and the welds are finished after install with as close a colour match as possible.
The third point catches more projects than people expect. We routinely specify shop-applied finishes on architectural beams, and we plan the connection details to be bolted wherever possible so the finish is shop-applied and pristine. When field welds are unavoidable, we plan the touch-up sequence and the colour-match before fabrication starts.
Where the welds go
On any exposed architectural beam, the welds are part of the visible surface. A shop that’s doing structural-only work will run welds that meet the structural standard without much attention to appearance, the welds will be functional but visually rough. A shop doing architectural-grade work will run the welds, grind them flush, address any surface texture, and prepare the beam so the welds disappear under the finish.
This is part of what distinguishes architectural fabrication from structural-only fabrication, and it’s why we recommend the same shop handle both the structural beam and the finish. Coordinating across two shops, structural fabricator delivers, finisher applies, is where the visible welds and inconsistencies creep in. The same shop, same drawings, same finish target produces a beam that reads as one designed object.
Fire protection
Whether an exposed steel beam needs fireproofing depends on the building code requirement for that occupancy. For most single-family residential beams, fireproofing isn’t required at all, the structural beam is exposed without intumescent coating or enclosure. For commercial, multifamily, or specific occupancy classes, the code may require a fire-resistance rating that needs intumescent paint, a fire-rated enclosure, or specific concrete encasement.
The structural engineer of record and the building department will tell you on a project-specific basis. If your project requires fireproofing, the finish question changes, intumescent coatings have their own appearance and the architectural finish layers on top of them, or the beam gets enclosed and the exposure question goes away.
Coordinating with the rest of the renovation
If the beam is going in as part of a load-bearing wall removal, the finish decision should be made before fabrication, not after install. The structural engineer, the architect, and the homeowner should sign off on a finish sample before the steel is fabricated, because some finishes affect how the steel is prepared at the shop.
We can produce finish samples on offcuts of the actual beam steel for client approval, mounted to a board with each option labelled. That sample is then the reference for the shop and the install, no surprises, no “this isn’t what I thought I was getting” conversations after the beam is up.
If you’re at the design stage of a Vancouver renovation that involves an exposed beam, bring us the structural drawings and the interior intent and we’ll walk through the finish options on the actual beam size and length your project needs. The finish decision is half the design, worth making with full information.