Every open-concept renovation in Metro Vancouver starts the same way: the homeowner wants a wall removed, the contractor says “we’ll need a beam,” and the first question is “how much?” The answer is almost never just the cost of the beam. A fabricated W10x33 is a modest line item on its own, but the fully installed project, including engineering, permits, shoring, installation labour, and all the patching afterwards, is a different order of magnitude. The beam itself is the cheapest part.
This post walks through every variable that drives the cost of a residential steel beam project in Metro Vancouver, so you know where the real budget goes. For an accurate quote on your specific project, contact our Burnaby shop with the span, floors above, and site access details, residential beam projects vary too much to ballpark without those specifics.
The eight cost categories on a residential beam project
Every residential beam job breaks into roughly the same eight buckets. Their relative size varies with the project, a straightforward wall removal in a 1990s Burnaby rancher is very different from a second-floor beam in a 1920s Kitsilano house with no exterior access.
- The beam itself, material and fabrication
- Structural engineering, sealed design for the permit
- Permits, building permit through the municipality
- Temporary shoring, support during demolition and installation
- Demolition, removing the existing wall
- Beam lifting and placement, getting the beam into position
- Connections and post/footing work, bearing plates, new posts, new footings
- Restoration, drywall, paint, flooring, and any rerouted services
The beam itself
The steel beam is the item homeowners fixate on, and it’s typically one of the smaller line items on the total project. The variables are:
Beam size. Residential beams are typically W-shapes in the W6 to W14 range. The engineer picks the section based on span, load, and allowable deflection.
Length. Beams are cut from 40 to 60 ft stock lengths at the steel service centre. Longer beams use more material and may require longer trucks to deliver.
Fabrication. Most residential beams need end plates or bearing plates welded on, bolt holes drilled, and the beam primed before it leaves the shop.
Quick reference for which sizes fit which jobs (the engineer determines the actual spec):
| Application | Typical beam size |
|---|---|
| Single-storey load, 10 to 14 ft span | W6x20 to W8x24 |
| Single-storey load, 14 to 20 ft span | W8x31 to W10x33 |
| Two-storey load, 10 to 14 ft span | W8x31 to W10x45 |
| Two-storey load, 14 to 20 ft span | W10x45 to W12x53 |
| Three-storey or heavy loads | W12x53 to W14x68+ |
| Garage door header, 16 to 18 ft | W10x33 to W12x40 |
The engineering determines the beam size based on two criteria: strength (can the beam carry the load without failing?) and deflection (does the beam bend so much under load that it cracks the drywall above?). Deflection usually controls residential beam sizing, the beam might be strong enough at a smaller size but would deflect more than the allowable L/360 limit, so the engineer upsizes to a stiffer section.
Steel prices fluctuate with the market. Your fabricator will quote current market prices at the time of contract.
Structural engineering
Every structural steel beam in a BC residence requires a sealed design from a registered Professional Engineer (P.Eng.). No exceptions. The building permit won’t be issued without it, and no reputable contractor will install a beam without engineering.
A few things worth knowing about residential structural engineering in BC:
The engineer works from the existing drawings, if they exist. Older Vancouver homes (pre-1980) often have no as-built drawings, so the engineer needs a site visit to measure existing framing, assess foundation conditions, and determine the actual loads. That site visit adds to the engineering fee.
The engineer sizes the bearing points, not just the beam. The beam carries the load to its endpoints, and those endpoints need to transfer the load down to the foundation. If the beam lands on a wood post, the engineer sizes the post and the footing below it. If the beam lands on a concrete foundation wall, the engineer confirms the wall can handle the point load. Bearing design is half the engineering work.
Turnaround time varies. In a busy Vancouver market, structural engineers are booked 2 to 4 weeks out. Rush fees (for same-week turnaround) add a premium. Plan ahead, the engineering timeline is often the longest single phase of a residential beam project.
Engineering fees are set by the engineer directly based on scope. Our structural steel guide for BC covers engineering requirements in more detail.
Permits
A building permit is required for any structural modification in every Metro Vancouver municipality. The permit application includes the sealed engineering drawings, a description of the work, and (in some municipalities) a shoring plan.
Typical processing times:
| Municipality | Typical processing time |
|---|---|
| City of Vancouver | 3 to 6 weeks |
| Burnaby | 2 to 4 weeks |
| Coquitlam | 2 to 4 weeks |
| North Vancouver (City) | 2 to 3 weeks |
| North Vancouver (District) | 2 to 4 weeks |
| West Vancouver | 3 to 6 weeks |
| New Westminster | 2 to 3 weeks |
| Richmond | 2 to 4 weeks |
| Surrey | 3 to 5 weeks |
Permit fees are set by each municipality. The permit process is straightforward but slow. Most homeowners don’t realize that the permit application goes into a queue, and the building department reviewer checks the engineering drawings, asks questions (often via formal “correction notices”), and the engineer responds. One round of corrections adds a week. Two rounds add two weeks. Budget the permit timeline into the project from the start, a six-week permit delay is not unusual in the City of Vancouver.
Temporary shoring
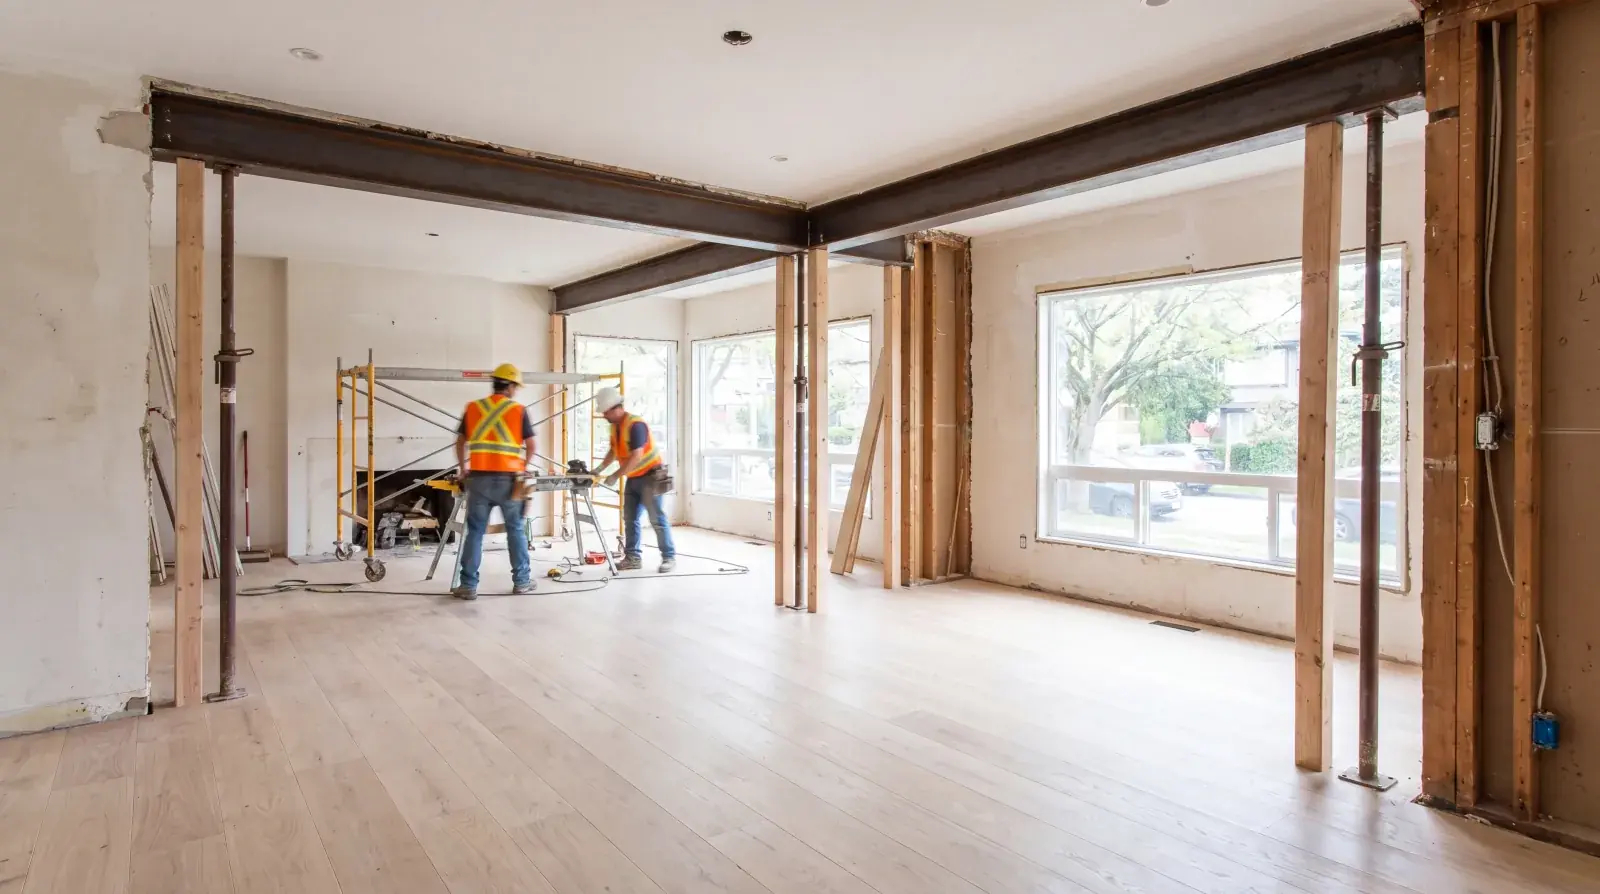
Before anyone touches the wall, the structure above it needs temporary support. Shoring uses adjustable steel posts (typically Acrow props) with timber beams to carry the loads that the wall currently supports. The shoring stays in place until the new steel beam is set and connected.
Simple shoring, supporting one floor above, with good access from below, is straightforward. Complex shoring, supporting two floors, or shoring from a basement with limited headroom, takes more posts, more timbers, and more time to set up and take down.
Shoring is not a shortcut item. Under-shoring a wall removal is how ceilings sag, floors crack, and renovation projects turn into insurance claims. The engineer specifies the shoring requirements on the sealed drawing, and the building inspector checks that the shoring matches the specification during the framing inspection.
Demolition
Removing the load-bearing wall means cutting out the studs, top plates, bottom plate, and any mechanical or electrical that runs through the wall. A clean wall with no plumbing or electrical is straightforward demo. A wall with a plumbing stack, HVAC duct, or electrical panel on it requires rerouting before demo, and those costs are plumbing or electrical trades, not the beam installer.
Before the project starts, identify every utility running through the wall. Photographs of the wall from both sides, attic access shots, and basement ceiling photos help the engineer and the contractor plan around services.
Beam lifting and placement
Getting a 500 to 1,000 lb steel beam into position inside a house is the logistical challenge of the project. On a main-floor wall removal with good access through a large door or garage opening, two workers can roll the beam in on a dolly and lift it into position with a chain hoist.
On a second-floor wall removal, or a house with tight access (narrow hallways, turns, stairs), the beam might need to come in through a window opening or be craned over the roof. Crane rental adds to the project cost depending on crane size and duration. Some beams on tight North Vancouver hillside lots or narrow East Vancouver lanes require a mini crane or a Spyder crane that fits through a standard door, specialized equipment that costs more.
The most extreme case we’ve handled: a W12x53 beam for a second-floor wall removal in a 1920s Kitsilano home with a narrow interior staircase and no exterior access. The beam went in through a temporary opening cut in the second-floor wall, lifted by a street-level crane. The crane rental and temporary wall opening added significant cost to the project beyond a standard installation.
Connections and post/footing work
The beam endpoints connect to the supporting structure, either sitting on top of a post or wall (bearing connection) or bolted to an adjacent beam or column (moment connection). Residential beam connections are almost always simple bearing connections: the beam sits on a bearing plate on top of a wood post or concrete wall, and the connection is made with bolts or welds.
If the beam’s bearing point lands on a new post location, which happens when you’re removing a wall and the beam endpoint doesn’t align with an existing column, a new post and footing are needed. A new steel post (typically 4” square HSS tube) plus a new concrete footing in the basement or crawlspace adds scope beyond the beam itself.
On slab-on-grade construction, common in Burnaby and Richmond single-storey homes, the new post might bear directly on the slab, but the engineer needs to confirm the slab thickness and reinforcement can handle the point load. If not, the slab gets cut, a new footing is poured, and the slab is patched.
Restoration: what blows the budget
The line items above cover the structural work. But a residential beam installation doesn’t exist in a vacuum, the wall that gets removed has drywall, paint, trim, flooring, and usually some mechanical and electrical running through it. The restoration costs are often equal to or greater than the structural costs.
Typical restoration items:
- Drywall patching and taping, ceiling and wall patching around the beam
- Painting, usually the entire room, not just the patch, to get a continuous finish
- Flooring repair, filling the wall footprint with matching flooring
- Trim and baseboard, replacing trim disrupted by the wall removal
- Electrical rerouting, moving switches, outlets, or circuits from the removed wall
- Plumbing rerouting, if the wall contained plumbing (worst case)
- HVAC modification, if a duct or vent ran through the wall
A “simple” wall removal, where the wall has no mechanical or electrical, good access, and the beam is a standard size, is very different from a wall removal that includes plumbing rerouting, flooring repair, and full repaint. Walk through your specific wall with the contractor before the project starts and document every service running through it.
Our load-bearing wall removal guide covers the full wall removal process in detail, including how to tell if a wall is load-bearing and what the alternatives are.
Steel beam vs. engineered wood beam
Not every beam needs to be steel. Engineered wood beams, LVL (laminated veneer lumber), PSL (parallel strand lumber), and glulam (glue-laminated timber), can handle many residential spans at lower material cost.
The trade-off is profile depth. A steel W8x31 carries the same load as a 3-ply LVL that’s 14 inches deep. In a basement renovation in Burnaby where the ceiling is already 7 ft 6 in, losing 14 inches to a dropped wood beam leaves you with 6 ft 4 in of headroom, below code minimum. The 8-inch steel beam keeps the headroom at 6 ft 10 in. That 6-inch difference is the reason steel beams dominate Metro Vancouver basement and main-floor renovations where ceiling height is already constrained.
In new construction or situations with generous ceiling height, engineered wood beams are often the better value. The wood is cheaper, easier to install (no welding, lighter to handle), and can be left exposed for an aesthetic that many homeowners in the Tri-Cities and North Shore prefer.
Flush beam vs. dropped beam
A dropped beam hangs below the ceiling line. The floor joists sit on top of the beam. It’s the simpler installation, set the beam, bear the joists on top, done. The beam is visible (usually boxed in with drywall) and reduces headroom by the depth of the beam.
A flush beam sits within the floor framing so the ceiling below is flat. The joists connect to the beam web with joist hangers rather than bearing on top. This preserves full ceiling height but adds cost, joist hangers at each joist location, labour to install them, and occasionally joists need to be notched or trimmed to fit.
The flush-beam premium is real but often worth it when ceiling height matters, which is almost always in a Metro Vancouver renovation.
Timeline: how long the whole project takes
| Phase | Duration | Notes |
|---|---|---|
| Engineering | 2 to 4 weeks | Site visit, design, sealed drawing |
| Permit application | 2 to 6 weeks | Varies by municipality |
| Beam fabrication | 1 to 2 weeks | Standard sizes from stock; custom sizes take longer |
| Shoring + demolition | 1 day | |
| Beam installation | 1 to 2 days | |
| Inspections | 1 to 2 weeks | Framing inspection, then final |
| Restoration (drywall, paint, flooring) | 1 to 2 weeks | |
| Total | 8 to 16 weeks | From first call to finished room |
The two longest phases, engineering and permits, happen before anyone touches the house. Plan for 4 to 10 weeks of desk work before the physical work begins.
Getting a beam quote: what to tell the fabricator
When you call our Burnaby shop or any steel fabricator for a residential beam quote, have these details ready:
- Span length, measure the wall opening or the distance between support points
- What the beam carries, roof only? Roof + one floor? Roof + two floors?
- Ceiling height, how much headroom is available for the beam depth?
- Access, can the beam get in through a door, or does it need to come through a window or wall opening?
- Engineering status, do you already have a sealed drawing, or do you need us to coordinate with an engineer?
- Permit status, has the permit been applied for?
A fabricator can give you a material and fabrication quote based on beam size and length. The installation quote requires more detail about site conditions. And the full project budget, including engineering, permits, and restoration, requires either a site visit or detailed photos and measurements.
Our steel fabrication page has more on how we handle residential structural steel projects across Metro Vancouver. For a quote, use the form on our contact page.